


Uneven ceilings tell on you. Light grazes across the surface, and every dip or crown shows up like a topographic map. That’s why pros lean on resilient channel not only for sound isolation, but also as a surprisingly precise tool for ceiling leveling—especially in Ontario renovations where framing has shifted over decades.
Below is a field‑tested, nuanced approach that blends carpentry discipline with modern drywall materials. No magic—just the right steps in the right order.
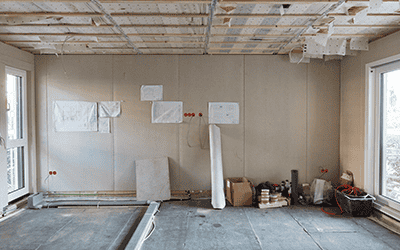
Start with the Ceiling You Actually Have (Not the One You Want)
Survey before you swing a drill. Use a rotary laser or long straightedge and pull quick notes:
- Deviation map: Mark highs/lows every 4 ft; note anything over ~6 mm (¼ in) across a 1.2 m (4 ft) span.
- Framing rhythm: Measure joist spacing (old homes love “almost 16 in” on‑centre).
- Services & penetrations: Lights, junction boxes, duct boots—anything that could “short‑circuit” the channel.
- Moisture & movement: Basements and bathrooms get different drywall materials (moisture‑resistant board, proper ventilation).
If you’re seeing more than ~12–15 mm (½–⅝ in) of total swing, plan a hybrid: selective sistering or furring to get within range, then let the resilient channel do the final finesse.
Resilient Channel vs. Other Leveling Options
- Furring/strapping (wood or hat channel): Great for big corrections, but transfers vibration and adds height.
- RC‑1 style resilient channel: Slim profile, decouples the board, and lets you micro‑tune plane while fastening.
- Clips + hat channel (full decoupling systems): Superior acoustically and for large corrections, but more parts and depth.
For most lived‑in rooms with moderate defects, resilient channel hits the sweet spot: thin, forgiving, and fast.
The Hardware Details That Make or Break the Job
- Orientation matters: The narrow flange (mounting leg) fastens to joists; the wider flange floats and receives drywall screws.
- Spacing: 400–600 mm (16–24 in) on‑centre across the ceiling, installed perpendicular to joists.
- Fasteners into framing: #6 or #8 screws long enough to bite 25–32 mm (1–1¼ in) into wood; self‑tappers for steel.
- Drywall screws into channel: #6 x 32 mm (1¼ in) fine‑thread for 12.7 mm (½ in) board; #6 x 41 mm (1⅝ in) for 15.9 mm (⅝ in). Do not overdrive—keep the paper intact.
- Edge rules: Keep drywall fasteners at least 10–13 mm (⅜–½ in) from edges; keep screws off the web of the channel slots.
Non‑negotiable: never let a drywall screw hit the joist. One missed screw can couple a whole area and print a ridge later.
Step‑by‑Step: Leveling with Resilient Channel
1) Snap a Plane You Can Trust
Strike a perimeter level line using a laser. If the ceiling is wildly out, sister or plane the worst joists first. Your goal is to bring variation within ~6–10 mm so the channel can do its job without excessive shimming.
2) Lay Out the Grid
Measure from the straightest wall and pop control lines for your resilient channel runs. First row within ~150 mm (6 in) of the wall, then 400–600 mm (16–24 in) on‑centre. Mark box locations and any “no‑screw” zones to avoid accidental coupling later.
3) Install Channels—Tune as You Go
Run channels perpendicular to joists. On humps, pull the channel tight; on dips, ease screw depth or use thin composite shims behind the mounting flange. Sight down each run—think of it like truing a bicycle rim. Keep butt seams landing on channel, not between.
4) Isolate Penetrations
Wrap boxes with backer rings or putty pads; keep a 3–6 mm (⅛–¼ in) gap around penetrations and seal later with acoustical sealant. Carry channel past penetrations; don’t create short stubs that telegraph.
5) Hang the Board the Right Way
Use sag‑resistant 12.7 mm (½ in) on smaller spans; 15.9 mm (⅝ in) adds both flatness and sound mass. Stagger seams; orient long edges perpendicular to channels. Drive into the wide flange only. Maintain a 3–6 mm (⅛–¼ in) perimeter gap for sealant.
6) Finish for Flatness
Feather butt joints wide (three coats, expanding each pass). Skim low areas lightly rather than over‑filling once. Strong raking light tells the truth—check before final sand and primer.
Common Mistakes (and Quiet Fixes)
- Accidental coupling: Screws into joists, tight can lights, or backing that touches framing. Fix: Pull offending fasteners, widen fixture clearances, and reseal gaps.
- Over‑spacing: Stretching channels past 24 in on‑centre invites waves. Fix: Add a mid‑run.
- Wrong flange: Hanging drywall on the mounting leg kills both leveling and acoustics. Fix: Re‑orient and re‑hang—there’s no shortcut.
- Penetrations without isolation: Pot lights and vents become sound bridges. Fix: Use isolation boxes or pads; seal edges.
- Heavy finishes on light board: Knockdown, texture, or crown moulding needs the stiffness of ⅝ in board across channels.
Choosing Drywall Materials that Help You Win
- Board: ⅝ in Type X for stiffness and sound; ½ in sag‑resistant for smaller rooms.
- Insulation (optional but smart): Mineral wool improves sound and tames room‑to‑room resonance.
- Sealants: True acoustical sealant stays flexible; standard caulk cracks and prints.
- Compounds: Lightweight base for first coats, topping for final feather; mesh only at repairs—paper tape at seams.
When to Switch Tactics
- Deviation over ~20 mm (¾ in): Move to clips + hat channel or re‑frame. RC alone will telegraph the roller coaster.
- Wet or unvented spaces: Solve ventilation and pick the right board before any drywall installation.
- Ceiling‑mounted cabinets/fixtures: Add solid backing behind the channel grid to keep decoupling intact.
The Payoff
Done right, ceiling leveling with resilient channel gives you three wins: a flatter plane under raking light, fewer stress cracks season to season, and quieter rooms. It’s a small detail with an outsized effect on how “finished” a space feels.
Work with Specialists Who Do This Every Week
If you’d rather skip the learning curve, bring in a crew that treats leveling like a craft, not an afterthought. Ontario Drywall and Taping balances laser‑straight ceilings with clean acoustical detailing and the right drywall materials for Ontario homes and commercial spaces.
Reach out to us by calling 647-878-4466, emailing info@ontariodrywallandtaping.ca, or completing our online form here.
