


When it comes to drywall installation, taping, and mudding are critical steps in creating seamless and visually appealing surfaces. Tapping reinforces joints and prevents cracks, while mudding conceals imperfections and provides a smooth finish. In this blog post, we will guide you through the step-by-step process of tapping and mudding, providing you with the knowledge to achieve flawless drywall surfaces in your home or project.
Preparing the Surface
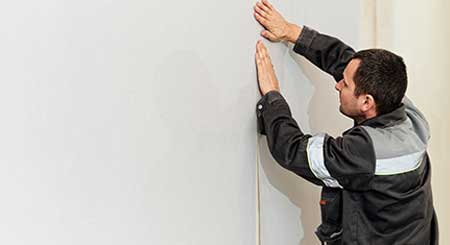
Before starting the tapping and mudding process, ensure the drywall surface is clean, free of dust, and properly secured to the studs. Inspect for any visible defects or uneven areas, addressing them before proceeding.
Taping
- Begin by applying a layer of joint compound, also known as mud, over the seams using a drywall trowel or putty knife.
- Place the tape over the wet compound, run it along the length of the joint, and press it firmly into the compound.
- Use the trowel or putty knife to smooth out the tape, ensuring it is firmly embedded in the compound and free of wrinkles or bubbles.
- Repeat the process for all joints, including horizontal and vertical seams, as well as corners.
First Coat of Mudding
- Once the tape is in place, apply the first coat of mud over the taped seams and screws using a wider trowel or drywall knife.
- Spread the mud smoothly and evenly, feathering the edges outward to create a gradual transition.
- Be careful not to apply too much pressure, as it may dislodge the tape or create uneven surfaces.
Sanding and Second Coat
- Allow the first coat of mud to dry completely, following the manufacturer’s instructions.
- Once dry, lightly sand the surface to remove any ridges or imperfections, ensuring a smooth finish.
- Apply a second coat of mud, extending it beyond the first coat to cover any remaining gaps or imperfections.
- Feather the edges of the second coat, blending it seamlessly with the surrounding area.
Final Coats and Sanding
- Allow each subsequent coat of mud to dry completely, sanding lightly between coats to achieve a smooth and even surface.
- Apply additional coats as needed, focusing on achieving a uniform and seamless finish.
- Pay attention to details such as corners and edges, ensuring they are properly smoothed and blended.
Finish Sanding and Finishing
- Once all coats of mud are dry and the surface is smooth, perform a final sanding to remove any remaining imperfections.
- Clean the surface thoroughly to remove dust and debris.
- At this stage, the drywall is ready for priming and painting or any other desired finishing treatments.
Achieving seamless drywall surfaces requires proper tapping and mudding techniques. By following the step-by-step process outlined in this blog post, you can ensure a flawless finish for your drywall installation project. Count on Ontario Drywall And Taping for all your drywall and taping requirements. We guarantee exceptional quality and customer satisfaction in every project we undertake.
