


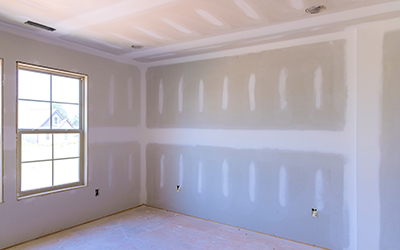
Once your new drywall is installed, you can focus on choosing your paint colours and decorating. However, painting cannot begin without proper preparation, using our step-by-step guide on how to paint new drywall.
The Importance of Proper Drywall Prep Work
Proper preparation ensures your drywall maintains a professional, smooth finish free of imperfections. Drywall requires primer before painting, as the seams, mud, and paper coating have varying “porosity.” As a result, they will absorb the paint differently, creating a messy, unprofessional look known as “flashing.” A primer made specifically for drywall equalizes porosity across the varied surfaces, but can also cause issues if the surface is not cleaned correctly.
Primer only adheres to a clean, dust-free surface, which also ensures even drying and requires fewer coats. While it might seem that skipping these steps saves time and money, it actually takes longer and costs you more to start painting right away. Without primer, you spend more time and money on the additional coats and paint to create a uniform surface.
Step #1: Calculate how much primer you need
In most cases, a gallon of primer should provide coverage for 300 square feet of new, bare drywall. Measure the room perimeter and height, and multiply the two numbers to get your total square footage, and then divide that by 300 to estimate how many gallons you need. Keep in mind that this is based on a single coat, which should do the job as long as the drywall primer is applied consistently across the entire surface. Our team of professionals prefers to apply at least two coats to avoid any signs of flashing.
Step #2: Choose the right primer
Painting drywall requires the right drywall primer to improve adherence and make application easier. There are generally three types to choose from:
- PVA (polyvinyl acetate) drywall primer or sealer is designed for professionally installed, completely bare new drywall installations.
- High-build primer is a thicker option that works well for DIY drywall projects where you might have a rougher, less even surface.
- Oil-based drywall is designed for humid, moist environments where purple or green drywall is used.
Pro Tip: Consider using a tinted primer to reduce the number of paint coats required. This is especially effective when using darker colours, like red.
Step #3: Inspect the walls for damage
Professionally installed drywall should be ready for primer without the need for further repairs or sanding. If applying primer to DIY walls, fill noticeable cracks and sand bumps before you begin.
Step #4: Dry brush the walls
Dry brush the walls with a clean paintbrush or use a vacuum and brush attachment to remove any remaining dust that has settled following the final sanding. If you skip this step, the dust creates a barrier between the primer and drywall, stopping it from adhering properly. If you begin applying the primer and notice lifting or bubbling, wipe it off immediately and dry brush to remove the fine dust particles. Vacuuming the floors also removes anything that can get stirred up as you work.
Step #5: Prime the perimeter
Work in manageable sections of 3’ x 3’ or 4’ x 4’, starting with a small 2” or 3” brush to cut in the edges along the floor and ceiling. Creating a consistent outline makes it easier to fill in the walls with your roller.
Pro Tip: If the entire room has new drywall, always start working from the ceiling down. This prevents drips on your freshly painted walls.
Step #6: Fill in the large area
As you complete each section, follow up with your roller, working while the perimeter is still wet. If you wait until the perimeter is dry, the primer won’t blend smoothly with your roller work. Apply the paint in a V or W pattern and then fill in the spaces as you work.
Pro Tip: An extension pole allows you to work faster and more comfortably from floor to ceiling.
Step #7: Allow the primer to dry
Follow the instructions on the can to ensure you provide enough drying time before you start painting or applying a second coat. If you don’t allow the primer to dry, it can lead to the same issues you see when you don’t remove dust, including poor adhesion. However, you can also create a surface that never dries. This scenario is caused when the first coat is not given enough time to cure properly. As the bottom coat continues to release moisture, it causes the top coat to remain soft and tacky.
Pro Tip: There are many factors that impact how long the primer takes to cure. Waiting beyond the recommended drying time is the safest bet to account for anything that might slow the drying process.
How to Paint New Drywall
You can follow steps #5 through #7 when painting new drywall, working in small sections, cutting in the edges, and finishing with the roller. For Step #7, pay attention to the recommended drying times, as paint tends to take longer to dry than primer. Again, it is crucial to ensure the paint is dry before applying additional coats.
Painting Trim and Doors
For trim and doors, spray painting can help create a smoother, more even finish than brushing or rolling, especially on detailed moulding, panels, and flat door surfaces. Be sure to mask surrounding walls, floors, hardware, and fixtures carefully before spraying, and use light, even coats to avoid drips or heavy buildup.
Proper Number of Coats
The number of coats depends on the quality of the paint and application in hand with the depth of colour. Darker colours will likely require several coats, while lighter tones often appear even after a single coat. It really depends on what you consider acceptable. Our professional painters aren’t satisfied until we reach a rich, perfectly even finish, no matter how many coats that might take!
Finish With Touch-Ups
Once the paint has dried completely, check the walls in different lighting throughout the day to look for spots that might need touch-ups. Daylight, soft artificial light, overhead lights, etc., all cast different shadows, which can impact how small imperfections reflect the light.
Contact the Experts at Ontario Drywall And Taping
The final results of your renovation can be ruined without properly prepping the drywall before painting. Following our step-by-step guide on how to paint new drywall helps ensure you have rich, fully saturated colour and professional-quality results.
Working with experienced drywall installers and painters avoids common mishaps that can diminish the value of your renovation investments. Ontario Drywall And Taping (ODT) offers end-to-end drywall solutions from framing to painting in order to perfect your Toronto, Vaughan, Mississauga, or GTA renovations. You can call us at 647-878-4466 or contact us here.

