


 Installing drywall is a major part of any home renovation project and it’s important to know the proper techniques for installation. If you’re planning on tackling a drywall installation project, it’s essential to understand the basics of drywall installation so that you can ensure the job is done right. Here are some tips and tricks to get you started.
Measuring the Space and Buying Materials
The first step in any drywall project is to measure the space that needs to be covered with drywall. It’s important to measure accurately so that you buy enough material for your project, as well as enough tape and joint compound (or “mud”) for taping and finishing. Once you’ve measured your space, you can go ahead and purchase the appropriate number of panels of drywall for your project.
Hanging the Drywall
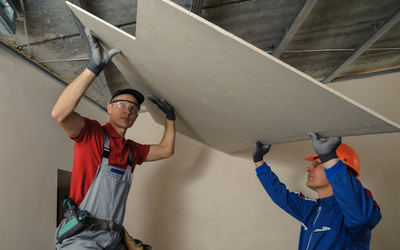
When it comes time to hang the drywall, make sure you have a helper on hand to help lift and position panels. Before mounting panels, take a few minutes to check them for damage. Once all panels have been checked, start by screwing horizontal rows onto studs or furring strips at 16-inch intervals. Be sure not to over tighten screws as this could cause issues during finishing. Make sure that screw heads are slightly below the surface of each panel before moving on to vertical rows which should also be spaced at 16-inch intervals along horizontal rows of boards.
Taping & Finishing
Once all panels are mounted properly, it’s time for taping and finishing. First up is taping your seams with paper tape or fiberglass mesh tape; both will work fine but if you want extra strength go with fiberglass mesh tape as it has more adhesive properties than paper tape does. After taping seams, use joint compound over seams and screw heads until they are flush with walls then let compound set overnight before sanding down excess mud using 120-grit sandpaper or an electric sander if available. Finally, apply two coats of primer followed by two coats of paint (or texture) in color/texture of choice; again letting primer set overnight between coats before adding second coat of paint or texture finish depending on desired look for wall surfaces being finished off with drywall installation process in home renovation projects!
Drywalls are essential components in many home renovations projects because they give walls a finished look while also providing insulation from sound and temperature fluctuations within homes! There are several steps involved in successful drywall installation including measuring spaces accurately, purchasing materials accordingly, hanging boards properly utilizing studs/furring strips at 16 inch intervals horizontally & vertically while also taking into account possible damage before mounting boards! Taping & finishing involve use of paper or fiberglass mesh tapes over seams while then applying joint compounds covering screw heads flush against walls after which primer & paint (or texture) can be applied respectively in order complete drywall installation process properly! Utilize these tips & tricks when attempting own DIY projects involving drywalls & achieve best results possible without having hire professional Drywall contractors unnecessarily! Happy renovating!
