Tips

Choosing the Right Drywall for Your Project: Types, Sizes, and Considerations

by Ontario Drywall |June 13, 2023 |0 Comments | Tips


When it comes to drywall installation, one of the crucial decisions you’ll have to make is selecting the right type and size of drywall for your project. The choice you make can significantly impact the overall quality, durability, and appearance of your walls. In this blog post, we will guide you through the different types of drywall available, their sizes, and the key considerations to keep in mind while making your selection.

1. Standard Drywall

  • Standard drywall, also known as regular gypsum board, is the most commonly used type of drywall for residential and commercial projects.
  • It is available in various thicknesses, typically ranging from 1/4 inch to 3/4 inch.
  • Thinner sheets are suitable for curved surfaces, while thicker sheets offer enhanced soundproofing and fire resistance.

2. Moisture-Resistant Drywall

  • Moisture-resistant drywall, often referred to as green board or blue board, is designed for areas with high humidity levels, such as bathrooms and kitchens.
  • It has a water-resistant core and a moisture-repellent paper face, which helps prevent mold and mildew growth.
  • Note that while moisture-resistant drywall is more resistant to moisture than standard drywall, it is not completely waterproof.

3. Fire-Resistant Drywall

  • Fire-resistant drywall, also known as Type X drywall, is specifically engineered to offer increased fire protection.
  • It contains additives that improve its fire-resistant properties, allowing it to withstand flames and heat for a longer duration compared to standard drywall.
  • Fire-resistant drywall is typically required in areas where building codes mandate specific fire ratings, such as garages and shared walls in multi-unit buildings.

4. Soundproof Drywall

  • Soundproof drywall, also called acoustic drywall, is designed to minimize sound transmission between rooms.
  • It contains additional layers of gypsum and sound-dampening materials, such as viscoelastic polymers, which absorb and reduce sound vibrations.
  • This type of drywall is ideal for home theaters, recording studios, or any space where noise control is essential.

Considerations

Purpose and location of the project: Determine the specific needs of the space where the drywall will be installed, such as moisture resistance, fire resistance, or soundproofing requirements.

Building codes and regulations: Familiarize yourself with local building codes to ensure compliance with the required drywall types and fire ratings for different areas.

Budget: Different types of drywall come at varying price points, so consider your budget while making a selection.
Installation requirements: Thicker and heavier drywall may require additional support during installation, so factor in the necessary structural considerations.

Aesthetics and Finish: Consider the desired appearance and finish of your walls, as some types of drywall may require additional steps for a smooth and seamless finish.

Choosing the right type and size of drywall is a crucial step in any construction or remodeling project. By understanding the different options available and considering the specific needs of your space, you can ensure a successful and long-lasting installation. Remember to consult with professionals at Ontario Drywall and Taping if you have any doubts or questions regarding your drywall selection.

Drywall Installation Safety Tips: Protecting Yourself and Your Space

by Ontario Drywall |June 12, 2023 |0 Comments | Tips


When it comes to any construction project, safety should always be a top priority. Drywall installation in Ontario may seem like a straightforward task, but it involves certain risks that need to be addressed to ensure your well-being and the protection of your space. In this blog post, we will share essential safety tips to keep in mind during drywall installation, helping you complete the project without any accidents or mishaps.

Use Personal Protective Equipment (PPE)

  • Wear safety goggles to protect your eyes from dust, debris, and potential flying particles.
  • Use a dust mask or respirator to prevent inhalation of dust and airborne particles.
  • Wear work gloves to safeguard your hands from cuts, abrasions, or irritation caused by handling drywall sheets or tools.
  • Consider using knee pads to provide cushioning and support when kneeling or working on the floor.

Ensure Proper Ventilation

  • Adequate ventilation is crucial during drywall installation to minimize the accumulation of dust and fumes.
  • Open windows or doors and use fans to improve air circulation in the workspace.
  • If working in an enclosed area, consider using dust collection systems or air purifiers to maintain a clean and breathable environment.

Lift and Carry Safely

  • Drywall sheets can be heavy and awkward to handle. Practice proper lifting techniques to avoid strains or back injuries.
  • Lift with your legs, not your back, and ask for assistance when dealing with larger or heavier sheets.
  • Use dollies or carts to transport and maneuver the drywall to reduce the strain on your body.

Secure the Work Area

  • Clear the work area of any tripping hazards, clutter, or obstacles that may impede your movement.
  • Ensure that the floor is clean and dry to prevent slips and falls.
  • If using ladders or scaffolding, make sure they are stable and properly set up before climbing on them.

Handle Tools Safely

  • Follow the manufacturer’s instructions and guidelines when using tools such as power drills, saws, or sanders.
  • Keep your tools in good condition, and replace any damaged or worn-out equipment.
  • Always unplug power tools when not in use and store them safely.

Electrical Safety

  • Before starting the installation, locate and mark any electrical wires or outlets concealed behind the drywall.
  • Turn off the power to the area where you’ll be working to prevent accidental electrical shocks.
  • Use non-conductive tools when working around electrical components.

Fire Safety

  • Keep fire extinguishers readily accessible in case of emergencies.
  • Avoid smoking or using open flames near the work area, as drywall materials are highly flammable.

Cleanup and Disposal

  • Clean up dust and debris regularly to maintain a tidy and safe workspace.
  • Dispose of waste materials, including drywall scraps and packaging, following local regulations and guidelines.

Remember, safety should never be compromised during any construction project. By following these safety tips, you can minimize the risk of accidents, injuries, or damage to your property while ensuring a smooth and successful drywall installation. Prioritize safety, use common sense, and seek Ontario Drywall and Taping professional assistance if needed to ensure a safe and enjoyable project experience.

Common Mistakes to Avoid When Taping and Mudding Drywall

by Ontario Drywall |May 17, 2023 |0 Comments | Drywall, Tips

When it comes to taping and mudding drywall, it’s important to get it right the first time. Properly taped and mudded drywall creates a seamless surface that’s easy to paint and provides a professional look to any room. Unfortunately, many homeowners make common mistakes when taping and mudding their drywall that can lead to unsightly blemishes and even structural damage. In this blog, we’ll explore some of the most common mistakes to avoid when taping and mudding drywall.

Using the Wrong Tape: The type of tape used for taping drywall is important. Paper tape should be used for flat seams, while mesh tape is recommended for inside corners. Using the wrong tape can lead to bubbling, peeling, or even cracking.

Not Applying Enough Mud: One of the most common mistakes is not applying enough joint compound, or mud when taping. This can result in an uneven surface, which will require additional coats of mud and sanding to fix.

Applying Too Much Mud: On the other hand, applying too much mud can lead to bumps, ridges, and other uneven surfaces. It’s important to apply mud in thin, even layers and let each layer dry completely before adding another.

Rushing the Drying Process: The drywall compound needs time to dry between coats. Rushing the drying process by applying too much mud too quickly, using a fan, or trying to speed up the drying process with heat can result in cracking and other issues.

Not Sanding Properly: After applying the final coat of mud, sanding is necessary to smooth out any bumps or ridges. Failing to sand properly can result in an uneven surface and poor paint adhesion.

Not Priming Before Painting: Before painting, it’s important to prime the drywall surface to ensure proper adhesion and a smooth finish. Skipping this step can lead to peeling, chipping, or uneven paint coverage.

In conclusion, taping and mudding drywall require patience, attention to detail, and the proper tools and materials. Avoiding common mistakes like using the wrong tape, not applying enough or too much mud, rushing the drying process, not sanding properly, and not priming before painting can result in a professional-looking finish that will last for years to come. If you’re not confident in your taping and mudding skills, it’s good to hire an Ontario Drywall and Taping professional drywall installer to ensure the job is done right.

The Importance of Proper Taping and Mudding Techniques in Drywall Installation

by Ontario Drywall |May 16, 2023 |0 Comments | Tips


When it comes to drywall installation, taping, and mudding are essential steps that ensure a smooth and professional-looking finish. If these steps are not done correctly, it can result in a lumpy or uneven surface, which can be difficult to correct later on. In this blog, we’ll explore the importance of proper taping and mudding techniques in drywall installation and how they can affect the overall quality of your project.

Taping

Taping is the process of applying tape over the joints between drywall panels to create a seamless surface. The tape acts as a reinforcement that prevents the joints from cracking or separating over time. It also covers the screw holes used to attach the drywall to the studs.

The key to proper taping is to ensure that the tape is firmly adhered to the drywall surface and that there are no air bubbles or wrinkles. One common mistake is not applying enough joint compound over the tape, which can result in a weak joint that is prone to cracking. It’s also important to use the right type of tape for your project. Mesh tape is typically used for inside corners, while paper tape is used for flat seams.

Mudding

Mudding, also known as joint compound or mud, is applied over the taped joints to create a smooth and even surface. It’s important to apply multiple coats of mud, with each coat being wider than the previous one, to create a tapered edge that blends seamlessly into the drywall.

Mudding, also known as joint compound or mud, is applied over the taped joints to create a smooth and even surface. It’s important to apply multiple coats of mud, with each coat being wider than the previous one, to create a tapered edge that blends seamlessly into the drywall.

Why Proper Taping and Mudding Are Important

Proper taping and mudding are crucial to achieving a high-quality finish in your drywall installation project. Without these steps, the joints between the drywall panels would be visible, resulting in an unattractive and unprofessional-looking surface. In addition, improperly taped and mudded joints can crack and separate over time, leading to costly repairs and renovations down the line.

In conclusion, taking the time to properly tape and mud your drywall installation project will result in a smooth, seamless finish that will stand the test of time. It’s important to hire the right techniques from Ontario Drywall and Tapping to achieve the best results possible.

Tips for Dealing with Mold on Drywall

by Ontario Drywall |April 17, 2023 |0 Comments | Tips


Mold on drywall is a common problem that many homeowners face. It not only looks unsightly but can also pose serious health risks, especially for people with allergies or respiratory problems. If you are dealing with mold on drywall, here are some tips to help you get rid of it and prevent it from coming back.

Identify the Source of Moisture

Mold needs moisture to grow, so the first step in dealing with mold on drywall is to identify the source of the moisture. Common sources include leaky pipes, roof leaks, and high humidity levels. Once you have identified the source of the moisture, you can take steps to fix the problem.

Remove the Mold

To remove mold from drywall, you will need to use a solution of water and bleach or a commercial mold cleaner. Wear protective gear, including gloves, a mask, and goggles, to protect yourself from mold spores. Use a scrub brush to gently scrub the affected area, and then rinse with clean water. Allow the area to dry completely before repairing or painting the drywall.

Replace the Drywall if Necessary

If the mold has penetrated deep into the drywall, it may be necessary to replace the affected area of the drywall. This is especially true if the drywall is sagging or discolored. You can cut out the affected area with a drywall saw and replace it with new drywall. Be sure to wear protective gear during this process, as cutting drywall can create a lot of dust.

Prevent Future Mold Growth

To prevent future mold growth, you will need to take steps to control the moisture in your home. This can include fixing leaky pipes, repairing roof leaks, using a dehumidifier to reduce humidity levels, and ensuring that your home is well-ventilated. You should also clean and dry any wet or damp surfaces promptly, as mold can begin to grow within 24 to 48 hours.

Call a Professional if Necessary

If you have a large amount of mold on drywall, or if the mold is in hard-to-reach areas, such as behind walls, you may need to call a professional mold remediation company. They will have the equipment and expertise to remove the mold safely and effectively.

In conclusion, mold on drywall can be a serious problem that requires immediate attention. By identifying the source of moisture, removing the mold, and preventing future mold growth, you can keep your home safe and healthy. If you are unsure about how to deal with mold on drywall, or if you have a large amount of mold, don’t hesitate to call a professional at Ontario Drywall and Taping.

A Step-by-Step Guide to Drywall Finish Levels

by Ontario Drywall |April 17, 2023 |0 Comments | Tips

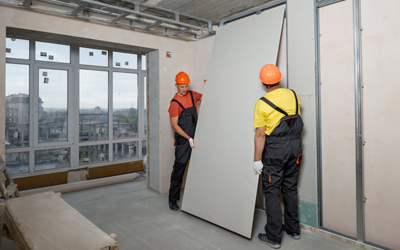
Drywall finishing is an essential part of any construction or renovation project. It involves the process of covering the joints and screw holes of drywall with a compound, which is then sanded and painted to achieve a smooth, flawless finish. However, not all drywall finishes are created equal. There are different levels of drywall finish, each with its own set of requirements and characteristics. In this blog, we will discuss the different levels of drywall finish and provide a step-by-step guide on how to achieve each one.

Level 0

Level 0 is the most basic level of drywall finish. It is typically used in unfinished spaces such as garages, attics, or storage areas where appearance is not a concern. At this level, the drywall is not taped or finished. Instead, it is simply screwed to the framing and left exposed.

Step-by-Step Guide:

  • Install drywall on the framing.
  • Screw the drywall to the framing.
  • Leave the drywall exposed.

Level 1

Level 1 is a step up from Level 0 but is still considered a basic level of finish. It is typically used in areas that will be concealed by a finish, such as behind wallpaper or paneling. At this level, the drywall joints are covered with tape, but no joint compound is applied.

Step-by-Step Guide:

  • Install drywall on the framing.
  • Cover the joints with drywall tape.
  • Do not apply joint compound.
  • Sand lightly to remove any excess tape.

Level 2

Level 2 is a slightly more advanced level of finish. It is typically used in areas that will receive a light texture or non-flat finish, such as ceilings or non-public spaces. At this level, the drywall joints are covered with tape, and a thin coat of joint compound is applied.

Step-by-Step Guide:

  • Install drywall on the framing.
  • Cover the joints with drywall tape.
  • Apply a thin coat of joint compound over the tape.
  • Feather the edges of the joint compound to blend it into the drywall.
  • Sand lightly to remove any excess compound.

Level 3

Level 3 is a standard level of finish that is suitable for most residential and commercial applications. It is typically used in areas that will receive a flat paint finish, such as walls in living areas or offices. At this level, the drywall joints are covered with tape, and a coat of joint compound is applied over the tape and screw heads.

Step-by-Step Guide:

  • Install drywall on the framing.
  • Cover the joints with drywall tape.
  • Apply a coat of joint compound over the tape and screw heads.
  • Feather the edges of the joint compound to blend it into the drywall.
  • Apply a second coat of joint compound over the first coat.
  • Sand lightly to remove any excess compound.

Level 4

Level 4 is a superior level of finish that is suitable for areas with critical lighting, such as conference rooms, dining rooms, or foyers. At this level, the drywall joints are covered with tape, and two coats of joint compound are applied over the tape and screw heads. The second coat is slightly wider than the first and is sanded to create a smooth, even surface.

Step-by-Step Guide:

  • Install drywall on the framing.
  • Cover the joints with drywall tape.
  • Apply a coat of joint compound over the tape and screw heads.
  • Feather the edges of the joint compound to blend it into the drywall.
  • Apply a second coat of joint compound over the first coat, making it slightly wider.
  • Sand the second coat to create

In conclusion, achieving a high-quality drywall finish requires attention to detail, patience, and the right materials and techniques. With these tips and a bit of practice, you can create a smooth, even surface that adds beauty and value to your home or business.

Plaster Walls vs. Drywall: Understanding the Main Differences

by Ontario Drywall |March 23, 2023 |0 Comments | Drywall, Tips

If you’re planning to renovate or build a home, you might be wondering what type of wall system to use. Two popular options are plaster walls and drywall. While they might look similar, there are significant differences between the two. Here are some of the main differences to consider when choosing between plaster walls and drywall.

Composition

Plaster walls are made from a mixture of gypsum, sand, and water. This mixture is applied in layers to a lath (a narrow strip of wood) to create a durable and long-lasting surface. On the other hand, drywall is made from gypsum board, which is a combination of gypsum and paper. It is available in large sheets that are hung on a framework of metal studs or wooden boards.

Installation

The installation process for plaster walls is more complex and time-consuming than for drywall. It requires skilled professionals who apply the plaster mixture in multiple coats and smooth it out to create a seamless finish. Drywall, on the other hand, is easier to install and can be completed in a shorter amount of time. However, it does require some skill to properly cut and hang the large sheets.

Durability

Plaster walls are known for their durability and resistance to cracking and damage. They can last for many decades and require minimal maintenance. Drywall, on the other hand, is more prone to damage and can easily crack or dent if it is hit or bumped. However, repairs are relatively easy and inexpensive to perform.

Soundproofing

Plaster walls are excellent at soundproofing a room, as they are thicker and denser than drywall. They can absorb and dampen sound waves, creating a quieter and more peaceful environment. Drywall, on the other hand, provides some degree of soundproofing, but not to the same extent as plaster walls.

Cost

The cost of plaster walls is generally higher than that of drywall, due to the additional labor and materials required for installation. Drywall is a more cost-effective option, as it is easier and quicker to install. However, the cost of repairs and maintenance over time may be higher for drywall.

In summary, plaster walls and drywall have distinct differences in composition, installation, durability, soundproofing, and cost. While plaster walls are known for their durability and soundproofing capabilities, they require more skill and time to install and can be more expensive. Drywall is a more affordable and faster option, but is less durable and provides less soundproofing. Ultimately, the choice between the two will depend on your specific needs and preferences.

Transform Your Home with These Drywall Renovation Ideas

by Ontario Drywall |February 23, 2023 |0 Comments | Drywall Installation, Drywall Repair, Tips

Drywall renovation projects can completely transform the look and feel of your home. Whether you’re looking to create a smooth, modern finish or add some texture to your walls, Ontario Drywall and Taping has got you covered. Here are some drywall renovation ideas to help you get started:

  1. Smooth Finish: A smooth finish is a classic choice for a clean and modern look. It involves using joint compound and sanding the walls to create a completely flat surface. This finish is perfect for adding a fresh coat of paint or wallpaper to your walls.
  2. Textured Finish: If you’re looking to add some visual interest to your walls, a textured finish might be the way to go. Ontario Drywall and Taping offers a variety of textures, including knockdown, popcorn, and orange peel. Textured finishes are great for hiding imperfections and creating a cozy, welcoming atmosphere.
  3. Coffered Ceiling: Coffered ceilings add depth and dimension to any room. This type of ceiling features a series of sunken panels that create a grid-like pattern. Coffered ceilings are perfect for adding a touch of elegance to a living room or dining room.
  4. Accent Wall: An accent wall is a great way to add some drama to a room without committing to a full renovation. Ontario Drywall and Taping can create an accent wall using drywall, which can be painted or wallpapered to add some color or pattern to your space.
  5. Curved Walls: If you’re looking for a truly unique feature, consider adding curved walls to your home. Curved walls can be used to create a dramatic entryway or to add a focal point to a living room or bedroom.

By incorporating these drywall renovation ideas into your home, you can transform your space and add value to your property. Contact Ontario Drywall and Taping today to learn more about our drywall services and how we can help you create the home of your dreams.


How Drywall Installation Can Give Your Home a Polished Look

by Ontario Drywall |December 15, 2022 |0 Comments | Drywall Installation, Drywall Repair, Tips

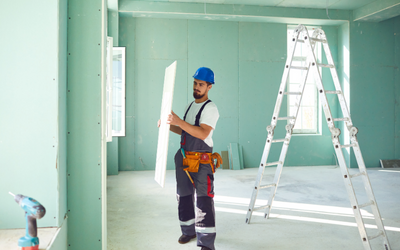
Whether you’re getting ready to sell your home or just want to spruce it up, drywall installation is the easiest way to give your home a polished look. Drywall is an essential part of any interior renovation project and is used in many homes in Toronto. It provides a smooth surface that can be painted or wallpapered and gives your home an elegant finish. Let’s explore how drywall installation can improve the look of your home.

Drywall Installation Basics

Drywall installation involves mounting sheets of drywall onto the wall frame with screws or nails. The drywall needs to be cut to fit any alcoves, corners, doors, and windows in the room where it’s being installed. Once the drywall has been secured in place, joints are filled with joint compound or mud and sanded down until they are smooth. This process will help ensure there are no bumps or rough spots on the walls when they are painted or wallpapered.

Benefits of Professionally Installing Drywall

When it comes to renovating your home, hiring a professional for drywall installation offers many benefits. Those include:

– Properly installing and finishing drywalls requires skill and experience; if done incorrectly, you could end up with costly repairs later on. A professional will make sure the job is done right from start to finish, so you don’t have to worry about redoing it yourself later on.

– Professionals understand all aspects of drywall installation and can advise you on which type of materials will work best for your specific project—from wood studs to fiberglass insulation—and how to use them effectively.

– They also know how much material you need for each job as well as what types of tools you need for cutting and securing drywalls into place. This helps save time and money by eliminating guesswork from the equation.

– Professional contractors also provide after-care services like cleaning up after the job is finished so that everything looks neat and tidy when they leave your property.

Drywall installation may seem like a daunting task but with the help of a professional contractor in Toronto, it doesn’t have to be! Installing new drywalls can transform any room quickly and easily, giving it a polished look that will last for years to come. So if you’re looking for an easy way to upgrade your home’s interior design without breaking the bank, consider investing in professional drywall installation services today!


Drywall Installation – What You Need To Know

by Ontario Drywall |November 28, 2022 |0 Comments | Drywall Installation, Drywall Repair, Tips

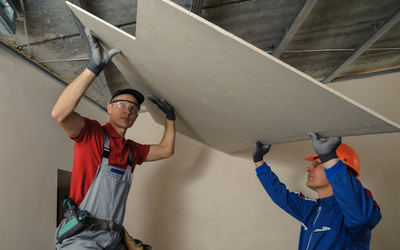
Installing drywall is a major part of any home renovation project and it’s important to know the proper techniques for installation. If you’re planning on tackling a drywall installation project, it’s essential to understand the basics of drywall installation so that you can ensure the job is done right. Here are some tips and tricks to get you started.

Measuring the Space and Buying Materials

The first step in any drywall project is to measure the space that needs to be covered with drywall. It’s important to measure accurately so that you buy enough material for your project, as well as enough tape and joint compound (or “mud”) for taping and finishing. Once you’ve measured your space, you can go ahead and purchase the appropriate number of panels of drywall for your project.

Hanging the Drywall

When it comes time to hang the drywall, make sure you have a helper on hand to help lift and position panels. Before mounting panels, take a few minutes to check them for damage. Once all panels have been checked, start by screwing horizontal rows onto studs or furring strips at 16-inch intervals. Be sure not to over tighten screws as this could cause issues during finishing. Make sure that screw heads are slightly below the surface of each panel before moving on to vertical rows which should also be spaced at 16-inch intervals along horizontal rows of boards.

Taping & Finishing 

Once all panels are mounted properly, it’s time for taping and finishing. First up is taping your seams with paper tape or fiberglass mesh tape; both will work fine but if you want extra strength go with fiberglass mesh tape as it has more adhesive properties than paper tape does. After taping seams, use joint compound over seams and screw heads until they are flush with walls then let compound set overnight before sanding down excess mud using 120-grit sandpaper or an electric sander if available. Finally, apply two coats of primer followed by two coats of paint (or texture) in color/texture of choice; again letting primer set overnight between coats before adding second coat of paint or texture finish depending on desired look for wall surfaces being finished off with drywall installation process in home renovation projects!

Drywalls are essential components in many home renovations projects because they give walls a finished look while also providing insulation from sound and temperature fluctuations within homes! There are several steps involved in successful drywall installation including measuring spaces accurately, purchasing materials accordingly, hanging boards properly utilizing studs/furring strips at 16 inch intervals horizontally & vertically while also taking into account possible damage before mounting boards! Taping & finishing involve use of paper or fiberglass mesh tapes over seams while then applying joint compounds covering screw heads flush against walls after which primer & paint (or texture) can be applied respectively in order complete drywall installation process properly! Utilize these tips & tricks when attempting own DIY projects involving drywalls & achieve best results possible without having hire professional Drywall contractors unnecessarily! Happy renovating!